When working with an unsubscribe link, Mailkit is a great "helper" because it won't allow you to send a marketing message without that link. If you do not insert the unsubscribe link into the email yourself, Mailkit will "force" it by inserting the default unsubscribe link at the beginning of your message (the link will be in the language in which you currently use Mailkit).

To prevent the default unsubscribe link from being inserted, enter your own link in your email. See this article for instructions on how to insert it correctly. Always make sure that the unsubscribe link is clearly visible and easy to find for the recipient. People naturally look for it at the end of an email.
Never hide a link, it is always significantly better that the recipient unsubscribes from your message than marks your message as spam, which can negatively affect your reputation. Your reputation may be negatively impacted by the high number of recipients who unsubscribe, but never to the extent that your reputation is affected by a large number of spam complaints.
If the unsubscribe rate starts to approach 1% or starts to differ significantly from the long-term average of your campaigns, you should be aware of what caused this change. Was the message not in line with your brand image? Maybe the recipients of the message just misunderstood? Has the frequency of campaign deliveries changed?

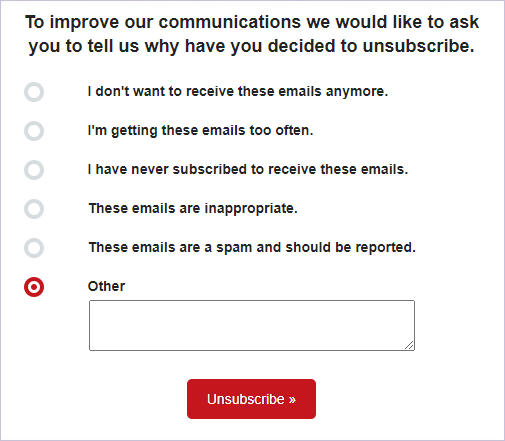
When the recipient decides to unsubscribe, ask why. Mailkit will also help you with that. The default unsubscribe page template offers the recipient to state the reason why he chose to unsubscribe. The recipient can choose from several options, or he can state another reason (describe in his own words why he decided to unsubscribe).
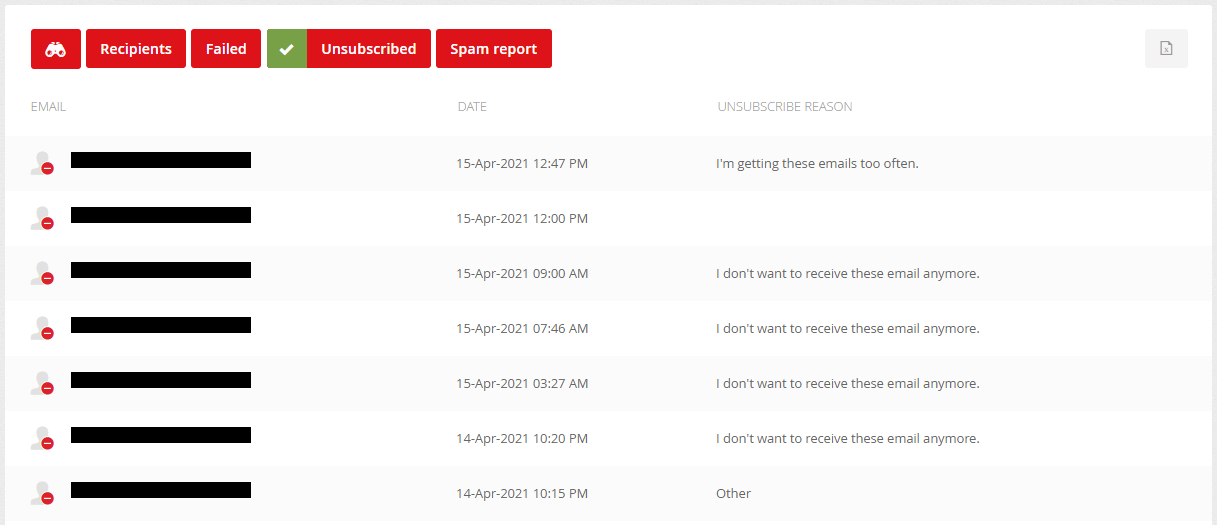
You can customize the reasons for unsubscribing as well as other parts of the template according to your needs. You will learn how to do this in this article. You can find the reasons your recipients have unsubscribed in the campaign delivery reports. Here you will find out the reasons given by the recipients of the specific campaign delivery.

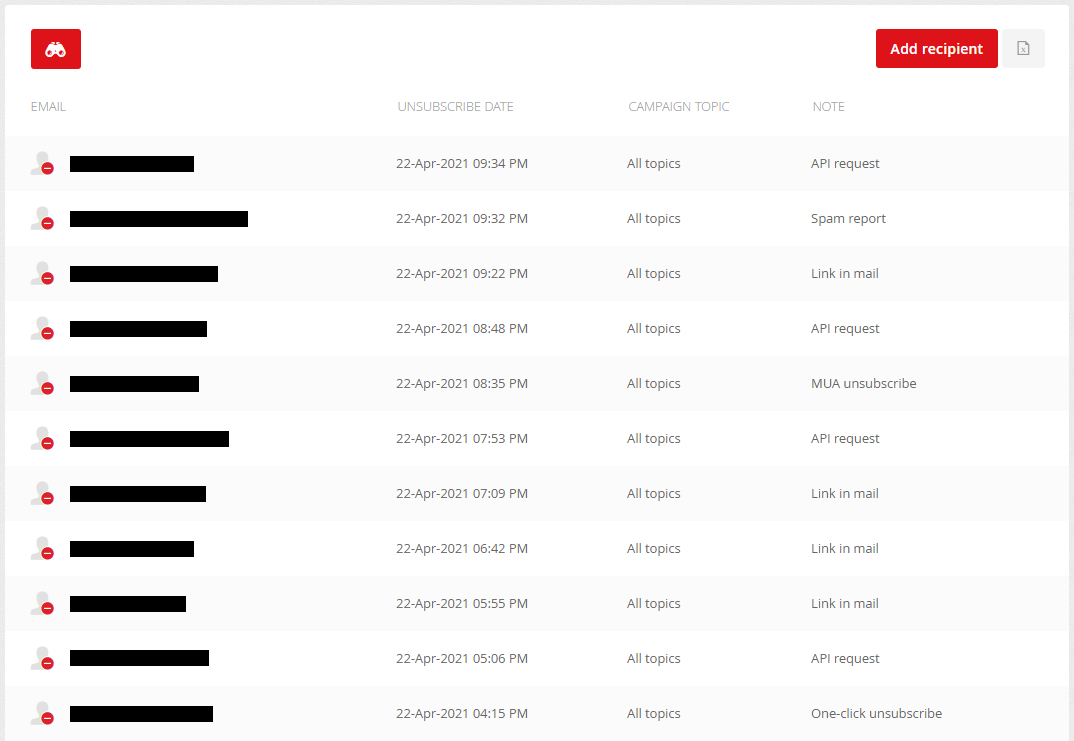
If you would like to find out the reasons given by all your recipients who decided to unsubscribe in the past (regardless of the specific campaign delivery), you can use the export of the list of unsubscribed recipients (see menu Recipients –> Unsubscribed recipients).

In the list of unsubscribed recipients, you will also find information on how the recipient unsubscribed:
- Link in mail – recipient clicked on the unsubscribe link in the newsletter
- API request – the recipient has been unsubscribed by calling API function mailkit.email.unsubscribe
- One-click unsubscribe/MUA unsubscribe – both have the same principle. Some Mail User Agents (MUA) allow the recipient to unsubscribe without having to search for the link directly in the message, but can click on the link in the email header.
- Spam report – sometimes the recipient does not find the unsubscribe link or does not even look for it and simply marks the message as SPAM. In this case, the recipient is unsubscribed immediately so that no more marketing messages can be sent to him.
- Manually added – in case you inserted the recipient among the unsubscribed ones manually/by import (for more see below)
The unsubscribe link should always be the primary place where the recipient unsubscribe if he or she chooses to do so. Sometimes it happens that the recipient does not find the unsubscribe link (even if you have done everything to make the link visible and easily identifiable) and contacts you, for example by phone, asking you not to send him any of your newsletters.
Even in this case, you should always first try to direct the recipients to their inbox to find one of your emails and help them find the unsubscribe link that they click on. This is an ideal way to record a logout. In addition, you can find out during the call what leads the recipients to unsubscribe, or if you use topics, you can help the recipients adjust their preferences.
Sometimes, however, the recipient no longer wants to look for an email or unsubscribe link, and insists that you unsubscribe him or she immediately. Then there is only one right way to do this - manually insert the email into the list of unsubscribed recipients:
- In the main menu select Recipients –> Unsubscribed recipients
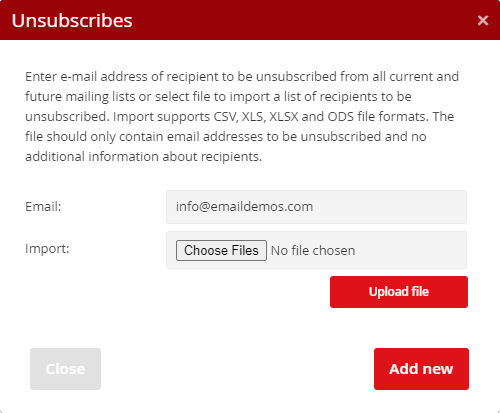
- Click on the “Add recipient” button
- In the “Email” field enter the email address of the recipient you want to unsubscribe
- Confirm the insertion by clicking on the "Add" button

From the moment of logout, no marketing message can be sent to such recipients. It is not necessary to delete unsubscribed recipients from the mailing lists, the status of the recipient relates to the email address as such and its status is reflected in all recipient lists in which the email address appears.
CAUTION: Deleting an email address from the recipient list will NOT unsubscribe the recipient. In addition, the recipient can be saved in other recipient lists, or can be added to the recipient list (from which it was deleted) during the next update or import. The only correct way to manually unsubscribe a recipient is to add it to the list of unsubscribed recipients (see above).
Import of unsubscribed recipients
Sometimes you need to import many unsubscribed recipients at once, for example, when switching from another tool. As mentioned above, consent is registered to an email address, so it is irrelevant from which tool you send the email. If you are switching from one tool to another and sending from both tools for a transitional period, you always need to keep the lists of unsubscribed recipients current in both tools.
If you want to perform a bulk import of unsubscribed recipients, you can do so in 2 ways – by uploading a file (eg XLSX) or using data sources.
Import of unsubscribed recipients using a file
To import unsubscribed recipients using a file, follow these steps:
- In the main menu select Recipients –> Unsubscribed recipients
- Click on the “Add recipient” button
- Select the file with the recipients you want to unsubscribe
- Confirm the import by clicking on the "Upload file" button
You can use the file in the following formats for import: CSV, XLS, XLSX and ODS. The file should only contain email addresses and no other recipient information.
Import of unsubscribed recipients using data sources
To import unsubscribed recipients using data sources, follow these steps:
- In the main menu select Profile –> Data Sources
- Click on the "Add data source" button
- Fill in the name of the data source and its source URL
- Select the type of data source – XML, JSON or CSV (in the case of an XML data source, also select “Mailing list” as the target)
- In the "Mailing list" field, select "* Unsubscribe emails"
- Set Authorization and Scheduled updates (if needed)
- Save the data source by clicking on the "Save" button
- Open the data source again, click on "Display structure", pair the field with the email address (other data about the recipient are irrelevant for import into the list of unsubscribed recipients) and click on "Save" button.
- Reopen the data source and click "Import"
After the import is completed, you will find the recipients in the list of unsubscribed recipients in the menu Recipients –> Unsubscribed recipients.
Resubcribe of unsubscribed recipients
Sometimes an unsubscribed recipient contacts you to ask you to subscribe again.
Regardless of how the recipient was first added to one of the recipient lists in your account (eg. by import, using a data source,…), to resubscribe, the recipient must go through a complete double opt-in process. This process should already be standard in gaining new contacts.
The easiest way to implement a double opt-in process is to add a subscribe form to your site. An alternative is to call API function mailkit.mailinglist.adduser.
If you don't know how to implement the double opt-in process, do not hesitate to contact us.


