Through simple and at the same time extensive conditions, it is possible to select recipients with whom it is possible to work further - for example, create a new list of recipients, edit data in bulk, copy, move or delete. Filters can be applied to one, several, or all recipient lists saved in the Mailkit account.
To create a new filter, first click the “Filter recipients” button and then you can start creating your filter.
From the drop-down list, select the mailing list(s) from which you want to filter:
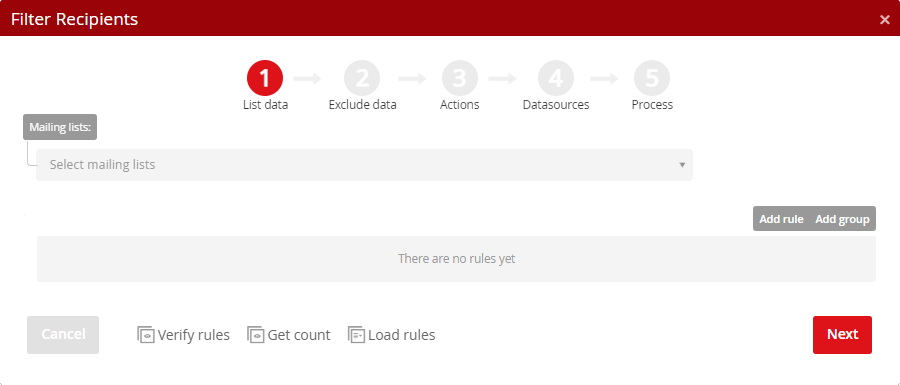
The first four steps are the same as for the Delivery capping filter. None of the steps is mandatory, ie. if you only want to filter by the data stored for the recipients in the recipient list, you can skip the other steps.
The 1st step of Filtering – recipient data
In the first step you can (but don't have to) create rules for segmentation based on recipient data. To create a rule, click the Add rule (to add one rule) or the Add group button (add multiple rules in one level). The total number of rules and their nesting is not limited.
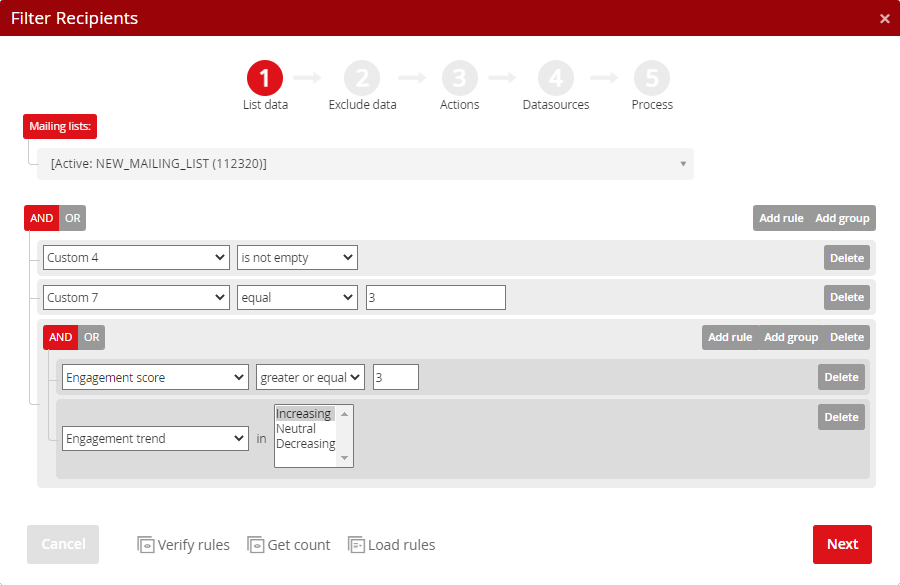
TIP no.1: Comparison of text fields applies to the use of operators equal, not equal, begins with, doesn't begin with, contains, doesn't contain – all comparison of text strings is ie. CASE INSENSITIVE.
Example: A city equals "prague" finds records with the value "prague" as well as with the values "Prague", "PRAGUE" or "PrAgUe".
TIP no. 2: Comparing text fields IGNORES diacritics for the use of operators equal, not equal, begins with, doesn't begin with, contains, doesn't contain:
Example 1: A city equals to "Červené Pečky" finds not only records with a value of "Červené Pečky" but also "Cervene Pecky".
Example 2: A city equals to"Cervené Pecky" finds not only records with a value of "Cervené Pecky", but also "Červené Pečky".
TIP no. 3: Comparing text fields by using operators exact match and not exact match DOESN'T IGNORE diacritics and at the same time is CASE SENSITIVE:
Example 1: A city has an exact match with "Červené Pečky" finds ONLY records with a value of "Červené Pečky".
Example 2: A city does not exactly match with "Červené Pečky" finds records with "Cervene Pecky", "červené Pečky", "ČERVENÉ PEČKY" and others, but DOESN'T find a record with a value of "Červené Pečky"
While creating filters, you can click the Verify rules button at any time to check that the set rules have the correct syntax. Therefore, the corresponding records (recipients) are not recalculated, which can greatly speed up the rule-making process in cases where a large number of records need to be checked.

The syntax is also checked when going to the next step by clicking on the "Next" button.
If the syntax of any of the rules is incorrect, the system will notify you and indicate the conditions/fields that need to be modified.
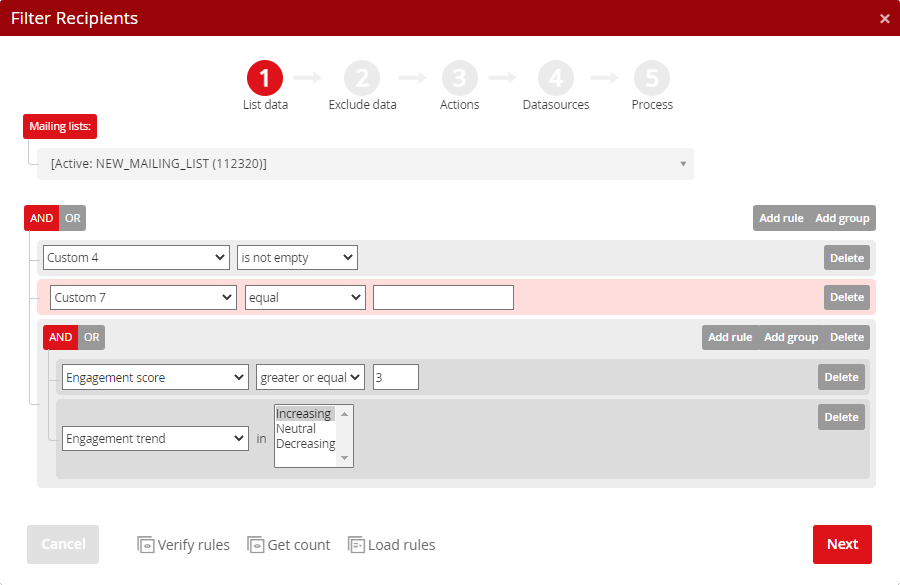
By clicking the Get count button, you can check how many recipients meet the specified conditions at any time.

If you do not work with the recipient's status when filtering recipients, all recipients from the selected recipient list(s) enter the calculation, regardless of their status. (In contrast, in the case of delivery capping filters, recipients to whom the message cannot be sent are already excluded at the input, ie recipients with a status of permanently undeliverable and unsubcribed recipients.)
You can save the created rules and then reuse them. To do this, use the Load rules (in the first step) and Save rules (in the fourth step) buttons. Rules management can be found in the menu Profile –> Queries.
The 2nd step of Filtering – exclude data
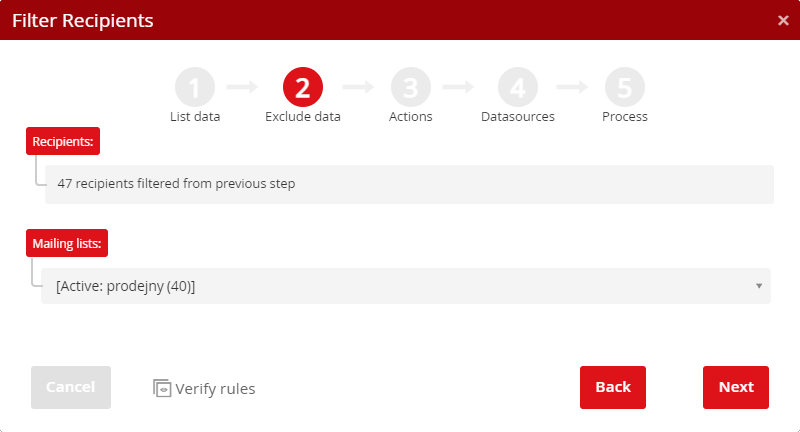
In the second step, you can (but do not have to) select the mailing list(s) that you want to completely exclude from the rule set in the first step. In this step, it is no longer possible to filter in the selected list(s) (select only some recipients from the list(s) to be excluded).
The 3rd step of Filtering – campaign delivery data
In the third step, you can (but don't have to) create rules regarding the distribution of campaigns to the recipients selected in the previous steps and their interactions.
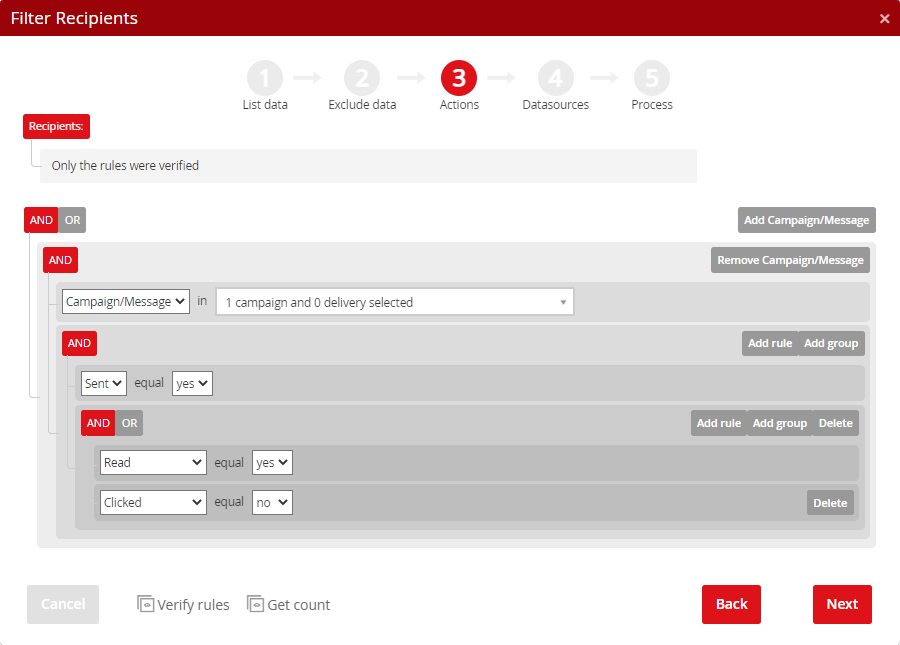
Start by clicking on the “Add Campaign/Message” button and select the campaign(s) or message(s) from the list. Only campaigns and messages from the past 1 year (365 days) are available for selection. Click the OK button to confirm the selection.
Using the Add rule or Add group buttons, you can define activities related to campaigns/messages (campaign deliveries), for example, whether the selected campaigns/messages were sent to the recipients or not, whether the recipients opened them, or whether they clicked on one of the links.
If you select multiple campaigns/campaign deliveries from the drop-down bar and at the same time work within the rules with information on whether the message was sent/recipient read it/recipient clicked, then the following applies to the YES/NO values:
- YES –> at least one of the selected campaigns/deliveries was sent to the recipient (the same applies to information about reading (i.e. the recipient read at least one of the sent messages) and clicks (i.e. the recipient clicked on one of the links in at least one of the messages))
- NO –> none of the selected campaigns/deliveries were sent to the recipient (the same applies to information about reading (i.e. the recipient did not read any of the sent messages) and clicks (i.e. the recipient did not click on the link in any of the sent messages))
The 4th step of Filtering – data sources
In the fourth step, you can narrow the selection by filtering over SQL data sources, such as the feed with orders from your e-shop, as shown in the picture below – from recipients who were filtered in the previous steps will be selected those who bought goods in the e-shop from categories starting with the numbers 23 or 24.
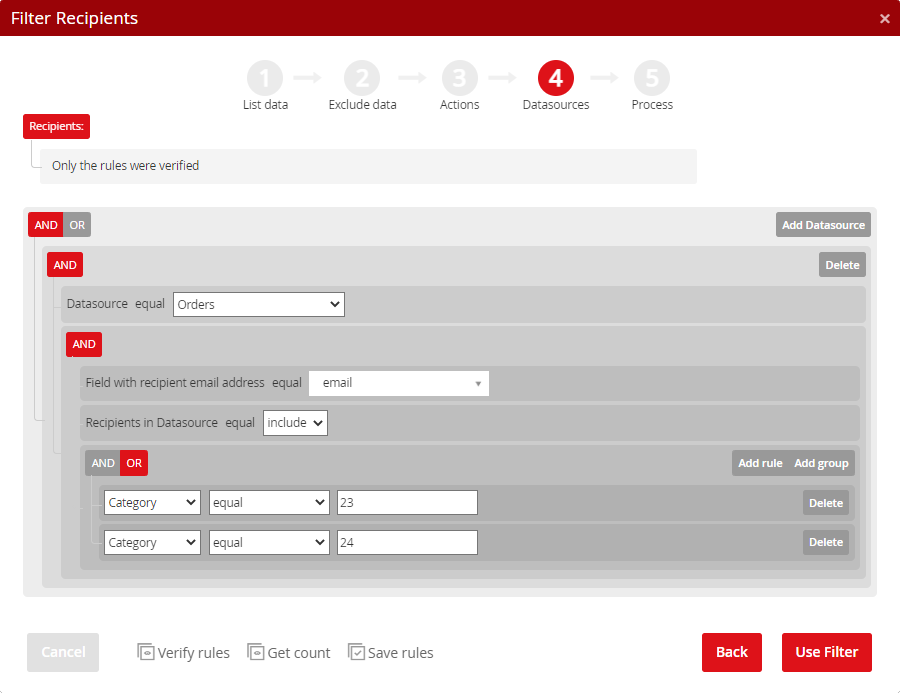
Start by clicking on the "Add Datasource" button and select the appropriate data source (the system will offer you SQL data sources that are stored in your account). The system analyzes the selected data source. Based on this analysis it selects the field in which the email address is stored. You can adjust this selection using the drop-down menu, in which you will find all the fields identified during the data source analysis. On the next line, you define whether the recipients who meet the condition of this step should be included in the selection or, on the contrary, they should be excluded from the selection. Then it is enough to define the condition itself.
Note: For a feed with orders, it is always necessary to keep in mind that the unique records in the feed are order items - ie. if there is an order that contains 3 items (different products), 3 records will be represented in the feed, with the same email address, delivery address and other data, but the items will differ eg. in product ID, product category, its quantity, price, etc.After completing the 4th step setup, you can save the created rules for possible use in other filters. After clicking on the "Use filter" button, the last window will appear in which you specify what you want to do with the selected recipients.
The 5th step of Filtering – processing
You can process all records selected by the filter, or you can select only specific emails.
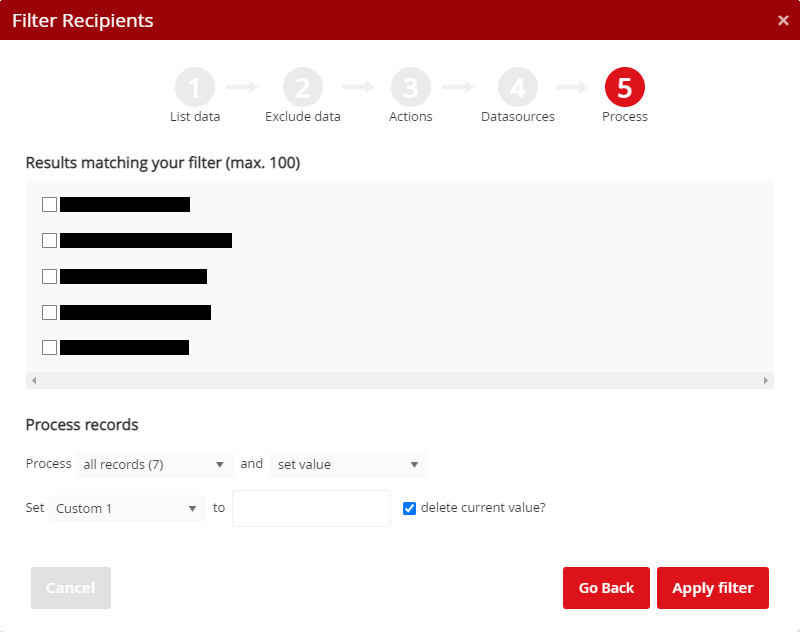
Selected records can be:
- copy: Copies the recipient to another recipient list. If the recipient is already in this list, it will not be copied.
- move: Moves recipients to another recipient list. If the recipient is already in this list, it will not be moved.
- delete: Deletes the selected recipients from the list selected in the 1st step.
- set value: It is possible to set a common value for selected recipients (eg. in custom field), or delete the current value.
- copy to new mailing list: Copies recipients to the new recipient list.
- set unsubscribe: Adds the recipient to the list of unsubscribed recipients. It will then not be possible to send any messages other than transactional messages to these recipients. In order to be able to send all messages to the recipient again, it must go through a complete double opt-in process.
Click the “Apply filter” button to perform the desired action.


