Campaign personalization
One way to increase your campaign's effectiveness is to personalize your messages, for example by adding the recipient's salutation or other personal information that you have stored in your recipient list.
For automated tagging, just click on the
A complete list of supported system tags can be found here.

-
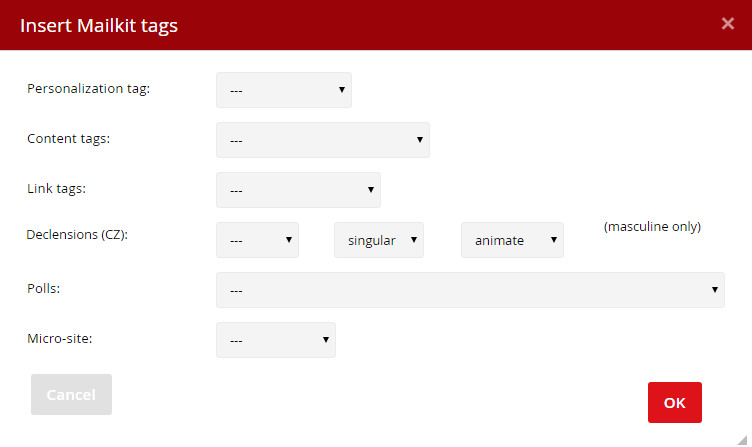
Personalization tag – Select the desired type of recipient information from the drop-down bar, which will be replaced by the individual data of each recipient before sending the message.
For example: To enter the recipient's name into the message body, NAME is selected, Mailkit will insert the tag into the body of the email in the place specified by your mouse cursor, by inserting the [FIRST_NAME] tag, which will be shown as (for example) "Mike" in the case where your subscribers full name is Mike Smith.
-
Content tags – You can insert the current day, month, or year into the message body. The desired information is selected from the drop down menu, which will be replaced by the current relevant data (current day, month, year etc.) at the time the campaign is sent.
For example, if a date is to be entered in the email, first select day from the drop down, click the Insert button and repeat the procedure for month. So, the campaign editor will display two tags - [DAY] and [MONTH] - which will be swapped for the current date when the campaign is dispatched.
-
Link tag – these codes can be used to insert a link for Unsubscribe from the Mailing list, or link for displaying in the Browser. From a legal standpoint, the single most important link is the unsubscribe link – so that every recipient is simply able to opt-out from a mailing list. If an unsubscribe link is not inserted in the message body using this method then the system will automatically insert a standard unsubscribe link prior to sending the campaign (except the transactional campaigns).
- Polls – a poll is created by selecting Poll from the drop down. The [POLL number] tag will be inserted into the message body, which will be interchanged when the message is sent out with the relevant poll you have created.
- Micro-site – a list of available micro-sites is available when you select micro-site from the drop down menu.
TIP: You can easily address the recipient by name "Dear Ms. Jones or Mr. Jones"
- in the recipient’s details must be gender indicated
- in the recipient’s details must be last name indicated
- put the following condition in the campaign editor
Dear [% IF recipient.GENDER == 'M' -%]Mr. [LAST_NAME][% ELSE -%]Ms. [LAST_NAME][% END %]
In some cases there may be a situation where the recipient's gender is missing in your records. In these cases you may add the following condition:
Dear [% IF recipient.GENDER == 'M' -%]Mr. [LAST_NAME][% ELSIF recipient.GENDER == 'F'-%]Ms. [LAST_NAME]
[% ELSE%]Customer [% END%]
... then in the case of a missing gender record (for example, gender not entered at sign-up), the recipient will simply see "Dear Customer".
TIP: You can create customized link for each recipient
- One of recipient's CUSTOM fields contains the entire url address – a link is inserted in the body of the email where [CUSTOMx] is specified instead of the url.
- Only part of the URL is listed in the recipient's CUSTOM field – a link is inserted in the body of the email, for example http://yourwebsite.com/[CUSTOMx].
You can insert the condition both in the editor and work with it in the HTML code as with ordinary text. However, conditions are governed by the templating language and thus primarily belong to templates.


