Overview and basic campaign management
All campaigns in your account are are automatically sorted by status into tabs:
- Active – campaigns that have been edited or sent in the last month
- Inactive – campaigns that have not been edited or sent for over a month (in last 30 days)
- Disabled – campaigns that have been disabled (and can't be sent unless enabled)
- Deleted – campaigns that have been deleted. The campaigns cannot be completely removed from your account to maintain the integrity of the reports. Deleted campaigns can still be viewed, but they can no longer be edited, posted, or revived.
- All – all campaigns in the system
To delete, disable or enable a campaign, click the arrow to the left of the campaign name.
Icons to the right of the campaign name


New campaign
New campaigns can be created by clicking the Add campaign button at the bottom of the right panel. Enter the main campaign information when a new window shows up.
You can use, edit, and send your campaign repeatedly – always with the current content and to the current recipient list. You can always see in your reports when the campaign was sent, with what subject, content and specific recipients. For this reason, for example, one single campaign is sufficient for sending a regular weekly newsletter. Also, create new campaigns with a view to your future orientation in your account.
Step 1 – Select campaign channel: Email or SMS and Campaign type: Standard or Remarketing.
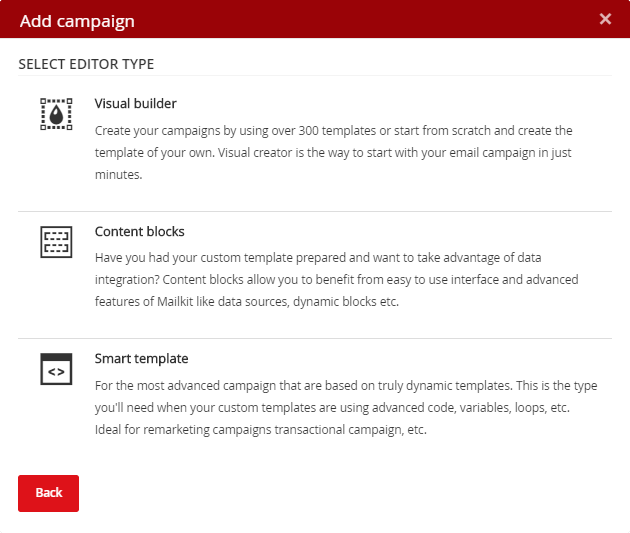
Step 2 (for email campaigns) – Select Editor type:
-
Visual builder – You can create your campaigns by using over 300 templates or start from scratch and create the template of your own. This allows you to create an email campaign in minutes without any knowledge of HTML. Visual builder cannot be used to prepare remarketing and transaction campaigns.
-
Content blocks – Have you had your custom template prepared and want to take advantage of data integration? Content blocks allow you to benefit from easy to use interface and advanced features of Mailkit like data sources, dynamic blocks etc. When you select this option, drop-down menu displays your templates that can be used to work with content blocks.
-
Smart Template – For the most advanced campaign that are based on truly dynamic templates. This is the type you'll need when your custom templates are using advanced code, variables, loops, etc. Ideal for remarketing campaigns transactional campaign, etc.

Step 3 – Fill out additional campaign settings:
-
Name (required field) – Name of your campaign that will show up in the list (used for identification only).
-
Subject (mandatory field) – Enter the subject of your campaign. This will be displayed to your recipients in the subject line. Subject can be changed at any time.
-
From – Select your sender address from the pull-down list. To add a new address click the Add address button and enter the desired email address. An email containing a verification link will be sent to this address. Once you click the link to verify the address will be available in the system for you to send your campaigns. Campaigns can be sent using verified addresses only. If you don't see the address you have added in the list it means it has not been verified yet. For more information see Address management. The sender can also be added / edited in the campaign settings.
-
Mailing lists – Select one or more mailing lists you want to send your campaign to. If you don't see any mailing lists you have to create one first. In case you select multiple mailing lists the system will take care of duplicate recipients during delivery. Mailing lists can be assigned later on.
If one recipient is in multiple selected lists, the email will be delivered to them only once. Recipients lists can be added to the campaign and, of course, changed at any time.


