API settings
The basis for communication with our API interface is identification data – API ID and MD5 code. In the integration settings, you will not only learn this information, but you also have the option to change the MD5 code in the event that it is leaked.

ATTENTION - If you change your MD5 hash, all your applications that use the current code will stop working until a new hash is entered on the application side.
For security reasons, the API only accepts connections from allowed IP addresses (or network ranges). For this reason, it is necessary to first add individual IP addresses, or subnets, or networks in this section. The format for entering network ranges is then using the netmask IP address, e.g. 192.168.1.0/24, to enable the full range 192.168.1.0-255.

ATTENTION: The security of the API is fully under your control and it is necessary to keep this list up-to-date in order not to misuse your account. We also don't recommend allowing access from the entire Internet by entering the network 0.0.0.0/0 – this solution may be offered where cloud services are used, but you should rather contact your cloud provider and obtain a static IP or your own subnet.
In order to successfully implement the Event API on your site, which is needed for conversion tracking and remarketing campaigns, you must first have the referrals on which the Event API will be deployed verified.

Simply add the name of the referrer and then create a file on the server with the name and content according to the instructions and have it verified.
ATTENTION: Authentication of the referrer (i.e. the source of the call) is a key security feature that cannot be omitted. Therefore, it is not possible to use resources for development and testing purposes that cannot be verified by the network (e.g. localhost). An Event API call from an unauthorized source always returns a 403 Forbidden response.
Link tracking tags
Generally the 3rd party tracking is done by passing identification information in the link to the website, also known as UTM parameters. The website analytics platform or any 3rd party system then uses the information passed in the URL to identify the referer (source) of the visit and further visitor tracking and reporting. You can create different tagsets for your campaigns. You can read more about link tracking HERE.

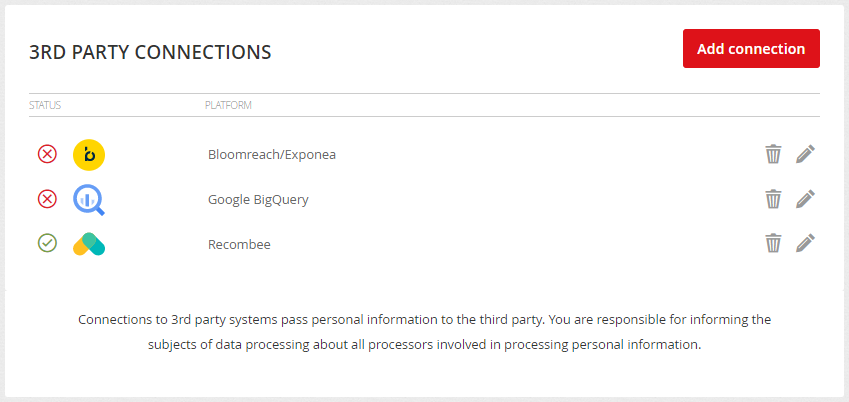
Directly in the Mailkit user interface, you can set up a connection to third-party systems so that you can pass data to them for further processing. Start by clicking the "Add connection" button and select the platform you want to connect to.
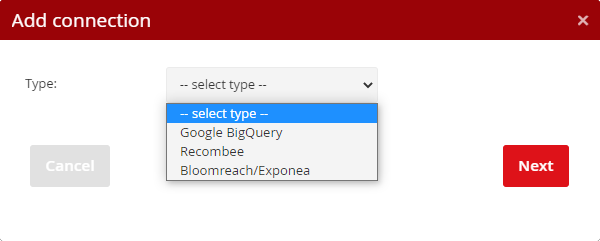
Google BigQuery is a tool for analyzing and manipulating data. You can further process the transmitted data and create other specific reports, dashboards and analyzes from them.
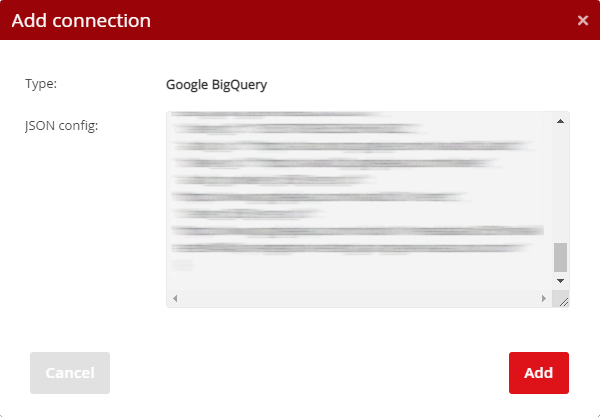
To set it up, you need to enter the JSON configuration with the access data of the so-called Service Account, which was created for this purpose in the Google Cloud Platform. The given service account must have the rights to manage the given BigQuery Project (BigQuery User) and to run the batches (BigQuery Job User).
Recombee
This integration connects the two systems to retrieve data from Recombee and fill it into your campaign templates (using the Recombee plug-in), as well as allows automatic event forwarding and sending data to Recombee automatically without the need to deploy additional Recombee code. Of course, a prerequisite is to use Recombee and have an imported product feed (Catalog Feed) in your Recombee account.
To set up the connection, enter the Database ID in the first step (found in the Recombee settings as the database name (API Identifier), then enter the Private Token in the second step.
As mentioned above, this integration also allows data to be sent to Recombee – for this purpose, just check the "Forward events" checkbox.
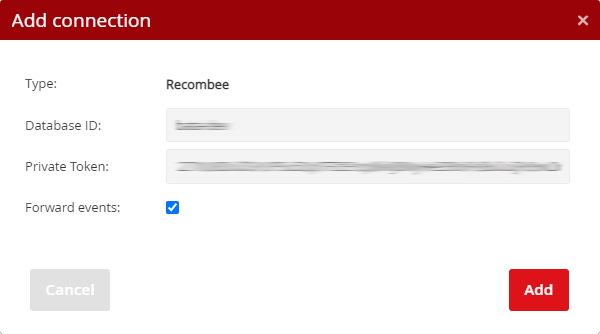
If our EventAPI is deployed and the field is checked, all actions (events add to the cart, purchases, etc.) will be automatically sent to Recombee, where further recommendations may occur. Therefore, if you have our Event API deployed on your site, you do not need to deploy scripts from Recombee, because Mailkit will automatically pass data from the events.
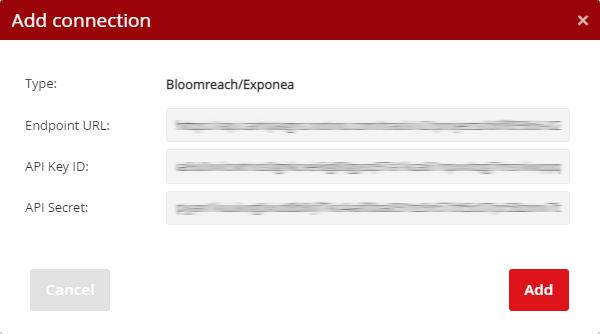
This integration allows you to automatically send information about sent (delivered, undelivered, ...) e-mails and recipient interactions to Exponea, where this information can be used in other scenarios.
For a successful connection, it is necessary to enter the Endpoint URL in the first step, then the API Key ID and the API password in the second step.
Once you have the integration set up in the Mailkit UI, please contact us to make any further necessary settings on our side.
Click on the


Webhook URLs
Mailkit allows data to be passed to the client's own interface for further processing using a webhook. Currently, webhooks are supported for registration of consent, separately for obtaining consent and withdrawing consent, i.e. Subscribe and Unsubscribe. Within each webhook, a different range of information is passed in the form of a JSON structure passed by POST by calling the URL specified in the Profile –> Integration menu in the Webhook URLs section.
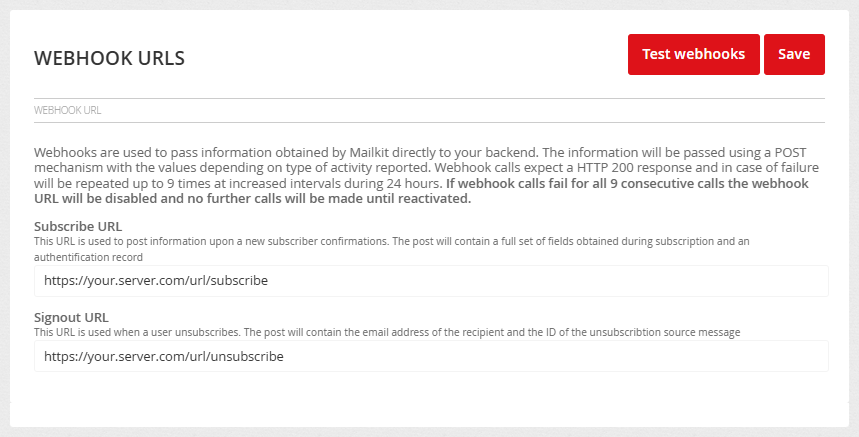
Subscribe:
The following values in the JSON structure are passed in the POST call within the login webhook:
EMAIL – email address
ID_EMAIL – ID of the email address
DATE – date and time of adding the email address in the format YYYY-MM-DD HH:MM:SS
AUTH – contains a SHA1 hash of the data calculated from concatenated a string of the value DATE, EMAIL + API MD5 of the account (e.g. “2020-11-25 11:20:03test@example.com1234567890abcdef1234567890”). (before the hash is generated, the email address is converted to lowercase form (e.g. TEST@Example.com is converted to test@example.com))
IP – IP address that confirmed the consent
IP_ORIG – IP address that confirmed the consent
ID_ML – ID of the recipient list
CHANNEL – channel with which consent was confirmed
UA – user-agent-string of the device to which the consent was granted
DATE_REQUEST – date and time when the login request was created
UA_REQUEST – user-agent-string of the device for which the login request was created
IP_REQUEST – IP address from which the login request was made
IP_ORIG_REQUEST – IP address from which the login request was made
URL_CODE – The verification code that confirmed the confirmation
FIRST_NAME – Name
LAST_NAME – Surname
FAX – fax
GENDER – gender
MOBILE – mobile phone
NICK_NAME – nickname
PHONE – telephone
PREFIX – degree
REPLY_TO – address for replies
STATE – state
STREET – street
VOCATIVE – addressing
ZIP – postcode
CITY – city
COMPANY – company
COUNTRY – country
CUSTOM1 – custom field no.1
...
CUSTOM25 - custom field no.25
Unsubscribe:
When you log out or change topics, the following values are passed in the JSON structure in POST:
EMAIL – email address or mobile phone number
ID_EMAIL – ID of the email address
CHANNEL – communication channel (email/sms)
DATE – date and time of logout in the format YYYY-MM-DD HH:MM:SS
AUTH – contains a SHA1 hash of the data calculated from concatenated a string of the value DATE, EMAIL + API MD5 of the account (e.g. “2020-11-25 11:20:03test@example.com1234567890abcdef1234567890”). (before the hash is generated, the email address is converted to lowercase form(e.g. TEST@Example.com is converted to test@example.com))
IP – IP address from which the logout took place (if available)
IP_ORIG – IP address from which the logout took place (if available)
ID_ML – ID of the list of recipients from which the logout was made
ID_SEND – ID of the campaign delivery from which the recipient logged out
ID_MESSAGE – ID of the campaign from which the recipient has logged out
ID_TOPIC_ACTIVE – list of active topics of the recipient (in case of a change of topics)
ID_TOPIC_INACTIVE – list of unsubscribed topics of the recipient (in case of a change of topics)
TIMEOUT – length of temporary logout (number of days)
EXPIRE – date and time when the temporary logout will be deactivated
METHOD – unsubscribed method (link_in_mail, manual, spam_report, list-unsubscribe_mail, api_unsubscribe, list-unsubscribe_oneclick, timeout)
UNSUBSCRIBE_ANSWER – selected reason for logout
UNSUBSCRIBE_NOTE – note on the reason for logout (if available)
Keep in mind that not all of these values may always be filled in, so they may be blank.
Webhook interface security
The interface that receives webhook calls from Mailkit should be protected against misuse. The webhook interface MUST use a secure https connection with a valid certificate. Of course, the lowest possible protection is to ensure that no one knows the URL of this interface. It's a good idea to verify the authenticity of requests by signing in the AUTH branch, which is calculated from the DATE, EMAIL, and API key values found in your account. After combining these values into one string, the SHA1 signature is calculated from this, which must match the AUTH value. This ensures that no one without knowledge of your API hash will be able to send unauthorized data to your webhook.
To restrict access to the interface only from Mailkit servers, restrict access only to IP addresses from the 185.136.200.0/22 network. Mailkit operates with its own infrastructure and does not use any third-party servers or cloud services, so it is certain that the requests coming from this network are valid requests. However, it is still advisable to have AUTH signature verification implemented. In cases where, due to internal security policies, security using IP addresses is not sufficient, we recommend using security using client certificates.
Security with client certificates
For the purpose of verifying the authenticity of the call, it is possible for the webhook call to be authorized using client SSL certificates. For this purpose, it is possible to use standard Mailkit certificates or certificates supplied by the client. If you use standard certificates, it is necessary to install the Mailkit public certificate available at https://static.mailkit.eu/mailkit_webhook_ca.crt on the client server with the webhook interface and set its use (here is an example for setting up on the Apache server):
SSLVerifyDepth 1
SSLCACertificateFile "/etc/ssl/mailkit_webhook_ca.crt"
If you need to use multiple certification authorities, it is appropriate to replace the SSLCACertificateFile directive with this line:
It is possible to place more root certificates in the given directory, then it is necessary to run another command:
Once the certificate is deployed on the server, it is possible to request verification and activation by email to helpdesk@mailkit.com.
In order to use custom client SSL certificates, the webhook provider must provide Mailkit with a client certificate and a RSA key protected by password. This password will be securely transmitted separately from the certificate.
Creating certificates using openssl
It is possible to generate a self-signed certificate as follows:
openssl req -days 3650 -new -x509 -key ca.key -out ca.crt
This ca.crt will be used by the web server at https://url_webhook_interface, i.e. for example the SSLCACertificateFile directive below needs to be directed. If you already use another CA certificate for this purpose, you can use it, but you will also need the key associated with this certificate.
Creating a key with a password and CSR:
You can then create a client certificate:
CAcreateserial -out mk.eu.crt
If you have a certificate and key created as above (here we assume the use of the above commands), you can verify them:
The next step is to ensure that the certificate is authenticated on the server via the webhook interface.
Example of certificate authentication configuration on Apache server:
SSLVerifyDepth 1
SSLCACertificateFile "/etc/ssl/mailkit_webhook_ca.crt"
The SSLCACertificateFile parameter must contain the path to the file generated as the authority certificate when generating the keys.
We now recommend that you test that the server requires a client certificate:
If everything is OK, the file mk.eu.crt and mk.eu.key must be sent to the Helpdesk. These files will then be deployed on the Mailkit side. Then send the password for the certificate (if it was entered during creation) separately (e.g. SMS) with information about the ticket ID from the helpdesk that was assigned to your certificate deployment request.
On the Mailkit side, the certificate will be decoded and the certificate will be recoded and stored with a system password that is different for each customer.
The functionality of the interface and certificate verification can then be simulated and verified, for example, using the curl utility:
-d '{"ID_ML":"1234","ID_MESSAGE":"12345","METHOD":"api_unsubscribe",
"UNSUBSCRIBE_NOTE":"abc","TIMEOUT":"","IP":"1.2.3.4",
"IP_ORIG":"0.0.0.0","ID_EMAIL":"123456","EMAIL":"test@somewhere.com",
"EXPIRE":"","ID_TOPIC_ACTIVE":"0","ID_TOPIC_INACTIVE":"0",
"ID_SEND":"123","DATE":"2018-08-31 12:33:15","UNSUBSCRIBE_ANSWER":""}'
In the call, the --cert and --key parameters include the path to the files containing the generated certificate and key. It is then necessary to add the address to the custom interface, which is to be tested.
The interface provider must ensure that the certificate is authenticated and only respond with status code 200, 202 or 204 if a valid request is made. Replies with a different status code will cause the webhook to retry with increasing delay until it expires after 24 hours when the webhook as a whole is deactivated.


