Email remarketing campaigns are quite different than the regular email campaigns - mostly because they have different rules for delivery. These campaigns are not setup for delivery at a specific time or schedule but rather with a preset delay from time the remarketing event has been last updated.
The trigger for a remarketing campaign is the existence of an event that the campaign is bound to. Event creation and management is described in the documentation for the Event API.
Creating a remarketing campaign
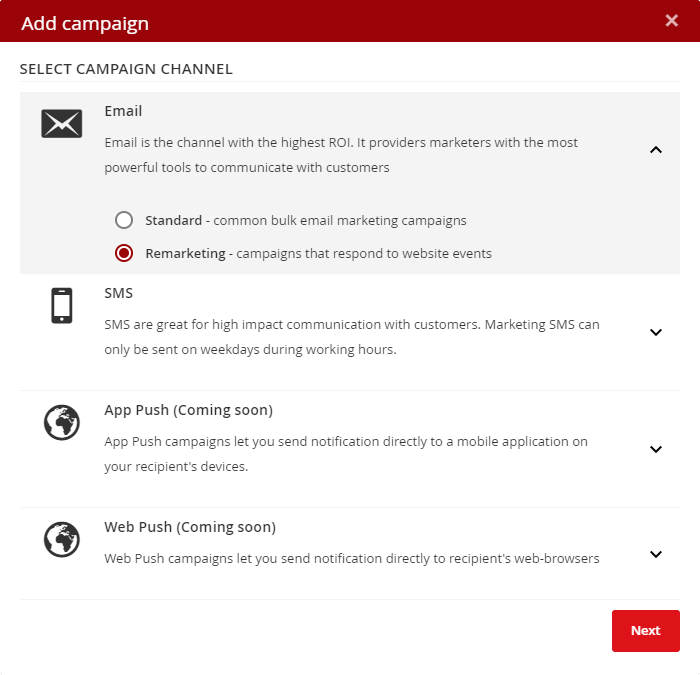
The fact that the campaign is going to be used for remarketing is set during campaign creation where campaign type needs to be set to remarketing.

Remarketing campaign settings


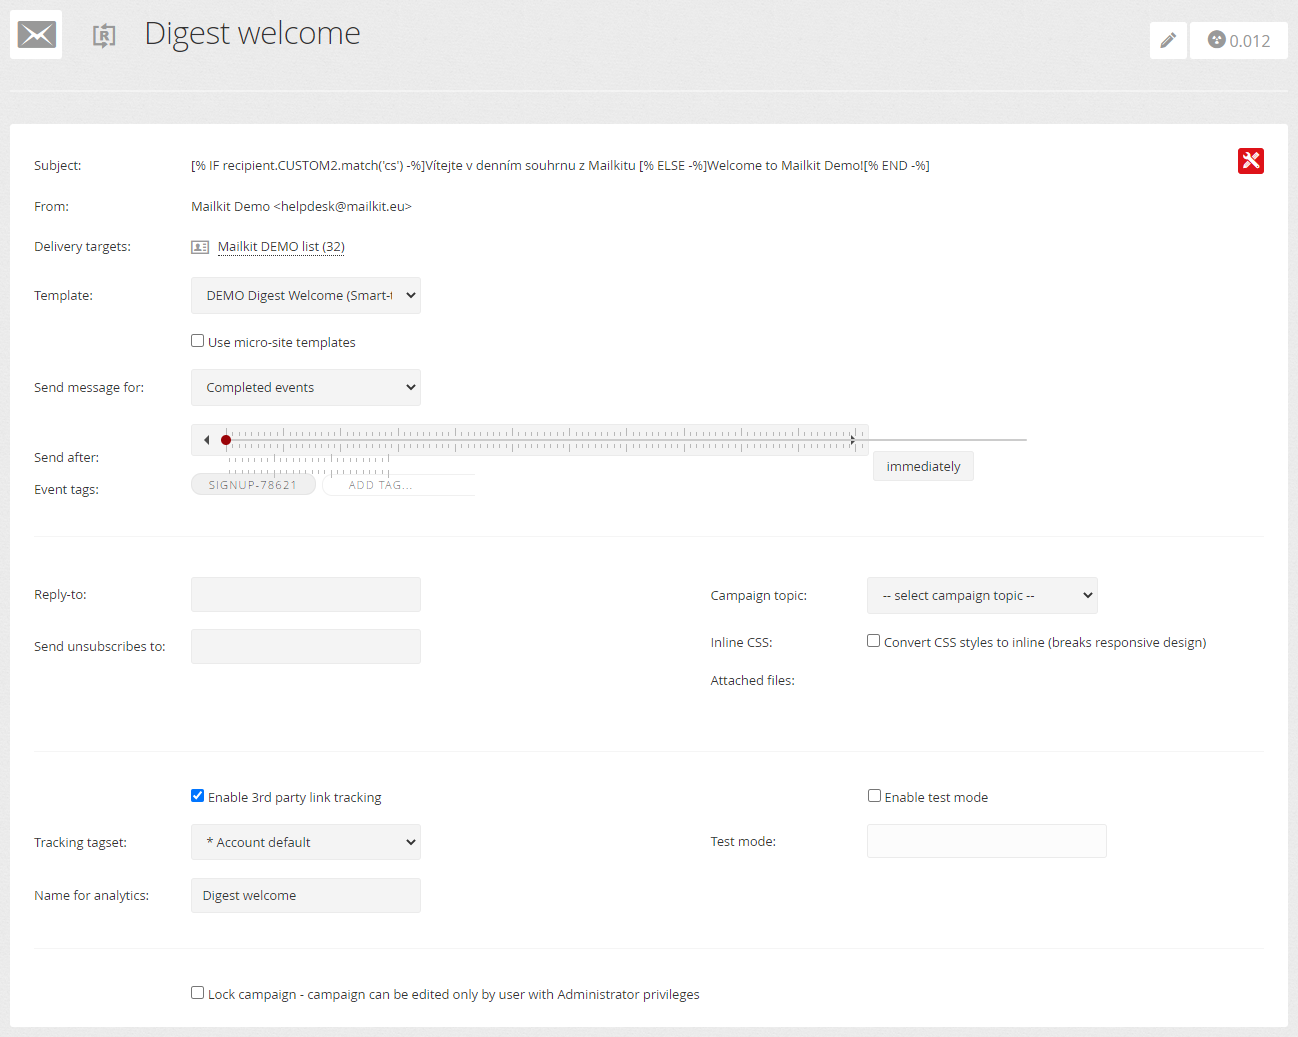
Subject
Fill in the subject of your campaign. Personalization and conditions can be used in the subject.
From
Select your sender address. Campaigns can be sent using verified addresses only. If you don't see any address it means no address has not been verified yet, or the address is on a domain that does not have DNS correctly set up, see Sending address setting.
Delivery targets
Select a mailing list to record the individual addresses to which the remarketing message was sent. We recommend using an empty recipient list, which will only be used to "catch" the data sent in the events.
Send message for
Choose one of two options to evaluate events - Incomplete events or Completed events. This basic rule helps you define the main event trigger when emails are being sent, for example if visitor has not completed a specific type of event (abandoned cart) or completed and you want to send a follow-up thank you note, invoice, etc.
Send after
How long after the last event activity the email will be sent.
Event tags
If you have multiple events setup on your website using different event_tags you can attach the campaign to specific tags you want to trigger the campaign. By default the campaign is not assigned to any tag and therefor will only get triggered by events with no event_tag defined. Only one tag can be associated with one remarketing campaign.
Test mode
You can switch your campaign to test mode and fill in the email address where all emails should be sent. The test mode works by sending all messages that would be sent to recipients when sent, only to the specified test address, but with the content and appearance in which they would have been sent to the recipients – if 100 recipients are assigned to a campaign and the campaign is sent with an active test mode, all 100 messages will be sent to the specified test address.
Remarketing campaign content
Once you have all the settings of your campaign set it's time to define the contents of the email itself. Remarketing campaigns behave the same way as any other email campaign in the system and can take full advantage of your templates to customize the layout as well as the content of the email. Also, the content of remarketing campaigns can be based on Content style. In addition to all the standard templating options you can also use the data of the event itself within the content editor or template using variables.
Here is a short example html to show how this works:
<html>
<head>
<title>Abandoned cart</title>
</head>
<body>
<p>Hi [% Event.first_name -%] [% Event.last_name -%],<br /><br />Order no. [% Event.order_no -%], created on <strong>[% Event.create_date -%]</strong></p>
<p>Cart items:</p>
<table border="1">
	<tr>
    	<td>image</td>
		<td>name</td>
        <td>items</td>
        <td>price</td>
	</tr>
    [% FOREACH EventItems -%]
    <tr>
    	<td><a href="[% product_url -%]"><img alt="[% name -%]" border="0" height="50" src="[% image_url -%]" width="100" /></a></td>
        <td><a href="[% product_url -%]">[% name -%]</a>([% description -%])</td>
        <td>[% item_qty -%]</td>
        <td>[% item_total -%][% item_curr -%]</td>
	</tr>
    [% END -%]
</table>
<p>To complete your order click to <a href="[% Event.return_url -%]">return to cart</a></p>
<p><a href="[SIGNOUT]" target="_blank">Or click to unsubscribe</a></p>
</body>
</html>
As you can see in the very simple example above all the event values collected using initEvent function are available using [% Event.PARAMETER -%] variables, where PARAMETER matches the name of initEvent function variable. This way you can insert the value of any event variable or even evaluate the values using IF, ELSIF, ELSE conditions. For example you can use conditions to insert different texts based on variable language parameter value:
[% IF Event.language == 'cs' -%]Czech text[% ELSIF Event.language == 'en' -%]English text[% ELSE -%]For all other languages[% END -%]
The same logic with variables is used to handle the event contents (items) using a loop [% FOREACH EventItems -%] which returns data for each of the variables used in the addItem function call.
Remarketing campaign testing
You can test your campaign in many ways. As with all campaigns in Mailkit you can get a preview of your campaign. Since it's crucial to see the actual content of a remarketing campaign the previews will show data from a random matching event to give you a more accurate preview of all the data. The same applies for test messages - the messages will contain data from an existing event. That is why we suggest our customers to start with adding event management scripts to their website first.
Obviously the best method of final testing is to switch your campaign to a test mode and see the specific content and times of messages sent based on events created on your website and compare them to your internal records.


